Quick Start
Get from zero to AI-controlled Unreal Editor, with full engine understanding, in under 10 minutes.
What Is AgentUX?
AgentUX gives you two things in one package:
- AgentUX Plugin: a UE 5.6+ editor plugin that exposes the Unreal Editor as a JSON-RPC 2.0 API over WebSocket
- UE-GraphRAG: a knowledge base built from UE source code with semantic search (Pro and Team Studio editions, indexes all 27 UE5 versions)
Put them together and your AI can control the editor AND understand the engine internals. No model can do that out of the box.
Here's how the pieces connect:
flowchart LR
    subgraph CLI["CLI Path (Pro/Max plan allotment)"]
        CC["Claude Code\n\nYour terminal"]
    end

    subgraph MCP["MCP Servers"]
        MCP1["agentux\n\nagentux_mcp_bridge.py"]
        MCP2["ue-graphrag\n\nGraphRAG MCP server"]
    end

    subgraph EDITOR["Unreal Editor"]
        PL["AgentUX Plugin\n\n660+ methods"]
    end

    CC -->|"MCP stdio"| MCP1
    CC -->|"MCP stdio"| MCP2
    MCP1 -->|"WebSocket :9877"| PL

    MCP2 --> N4["Neo4j"]
    MCP2 --> LDB["LanceDB"]

    subgraph API["API Path (per-call billing)"]
        AP["Anthropic API"]
    end
    AP -.->|"MCP stdio"| MCP1
    AP -.->|"MCP stdio"| MCP2

    style CLI fill:#0d1117,stroke:#4a9eff,color:#e0e0e0
    style MCP fill:#0d1117,stroke:#4a9eff,color:#e0e0e0
    style EDITOR fill:#0d1117,stroke:#50c878,color:#e0e0e0
    style API fill:#0d1117,stroke:#ffa500,color:#e0e0e0
    style CC fill:#1e3a5f,stroke:#4a9eff,color:#e0e0e0
    style MCP1 fill:#1e3a5f,stroke:#4a9eff,color:#e0e0e0
    style MCP2 fill:#3d1a3d,stroke:#c77dff,color:#e0e0e0
    style PL fill:#1a3d2e,stroke:#50c878,color:#e0e0e0
    style N4 fill:#3d1a3d,stroke:#c77dff,color:#e0e0e0
    style LDB fill:#3d1a3d,stroke:#c77dff,color:#e0e0e0
    style AP fill:#3d3a1a,stroke:#ffa500,color:#e0e0e0
The blue path is editor control (required, included in every edition). The purple path is engine knowledge (optional, Pro and Team Studio editions). The solid lines show the normal CLI path, which uses your Claude Pro or Max plan allotment at no extra cost. The dashed lines show the API path, which you can switch to when your plan allotment is consumed. Both paths use the same MCP servers and plugin. AgentUX runs as a local MCP server called by Claude Code; it is not a third-party API client and is unaffected by third-party tool restrictions.
What You're Installing
| Capability | What It Does | Required? |
|---|---|---|
| Editor Control | 662 JSON-RPC methods over WebSocket. Spawn actors, edit materials, control Sequencer, manipulate Blueprints, configure Movie Render Queue, scan and migrate assets across projects, and more | Yes (core) |
| Safety Guards | Two-layer crash prevention: hardcoded guards block unsafe operations, and error messages tell the AI how to self-correct | Yes (built-in) |
| Engine Knowledge | Source-accurate engine knowledge: your AI verifies exact property names, function signatures, and class hierarchies before writing code (Pro and Team Studio editions, all 27 UE5 versions) | Optional |
Both show up as MCP tools in Claude Code. Editor Control works on its own. Start with just the plugin and add the knowledge base whenever you're ready.
Prerequisites
Community edition: You only need Unreal Engine and Python. No Java, no Neo4j. All 45 handlers, 662 methods, MCP Bridge included.
Pro / Team Studio editions: You'll also need Java and Neo4j for the knowledge base.
| Requirement | Version | Required For |
|---|---|---|
| Unreal Engine | 5.6+ (5.7 recommended) | Editor Control (662 methods on 5.7, 577 on 5.6) |
| Python | 3.10+ | MCP Bridge + GraphRAG |
| Neo4j Community | 5.x | Engine Knowledge (optional) |
| Java | 21+ | Neo4j runtime (optional) |
For download links, verification commands, and details on why each dependency is needed, see the Installation Guide prerequisites.
Quick Setup
The full setup takes four steps. For detailed instructions, see the Installation Guide.
1. Install the Plugin
Retail build: Copy the AgentUX folder into the engine plugins directory (recommended, serves all projects):
<UE Install>/Engine/Plugins/Marketplace/AgentUX/Source build: Copy into the engine's plugin directory and build:
Engine/Build/BatchFiles/Build.bat UnrealEditor Win64 Development -Module=AgentUXEnable the plugin in your .uproject:
{
  "Plugins": [
    { "Name": "AgentUX", "Enabled": true }
  ]
}2. Run the Installer
From the AgentUX root directory:
python install.pyThe Free edition installer handles Python dependencies, MCP config generation for Claude Code, the Home Project directory, and workspace creation. To set the Home Project non-interactively for scripted installs:
python install.py --home-project "/path/to/your/HomeProject"If you have the Free edition installed and want to keep it that way (no GraphRAG, no Neo4j, no Java), the installer skips the optional knowledge-base steps automatically.
Pro and Team Studio: The same install.py handles GraphRAG setup (Neo4j, knowledge base restoration, ONNX embedding model, optional inventory-sync into Neo4j when a local catalog is detected). For the full Pro setup walkthrough including Neo4j prerequisites and verification steps, see the detailed Installation Guide.
3. Configure Claude Code
Add the generated MCP servers to your Claude Code settings (.claude/settings.json):
{
  "mcpServers": {
    "agentux": {
      "command": "python",
      "args": ["<path-to>/AgentUX/Bridge/agentux_mcp_bridge.py"]
    },
    "ue-graphrag": {
      "command": "python",
      "args": ["<path-to>/AgentUX/GraphRAG/mcp_server/server.py"],
      "env": {
        "GRAPHRAG_CONFIG": "<path-to>/AgentUX/GraphRAG/config.yaml"
      }
    }
  }
}
If you skipped GraphRAG, omit the ue-graphrag entry.
4. Launch and Verify
Open Unreal Editor.
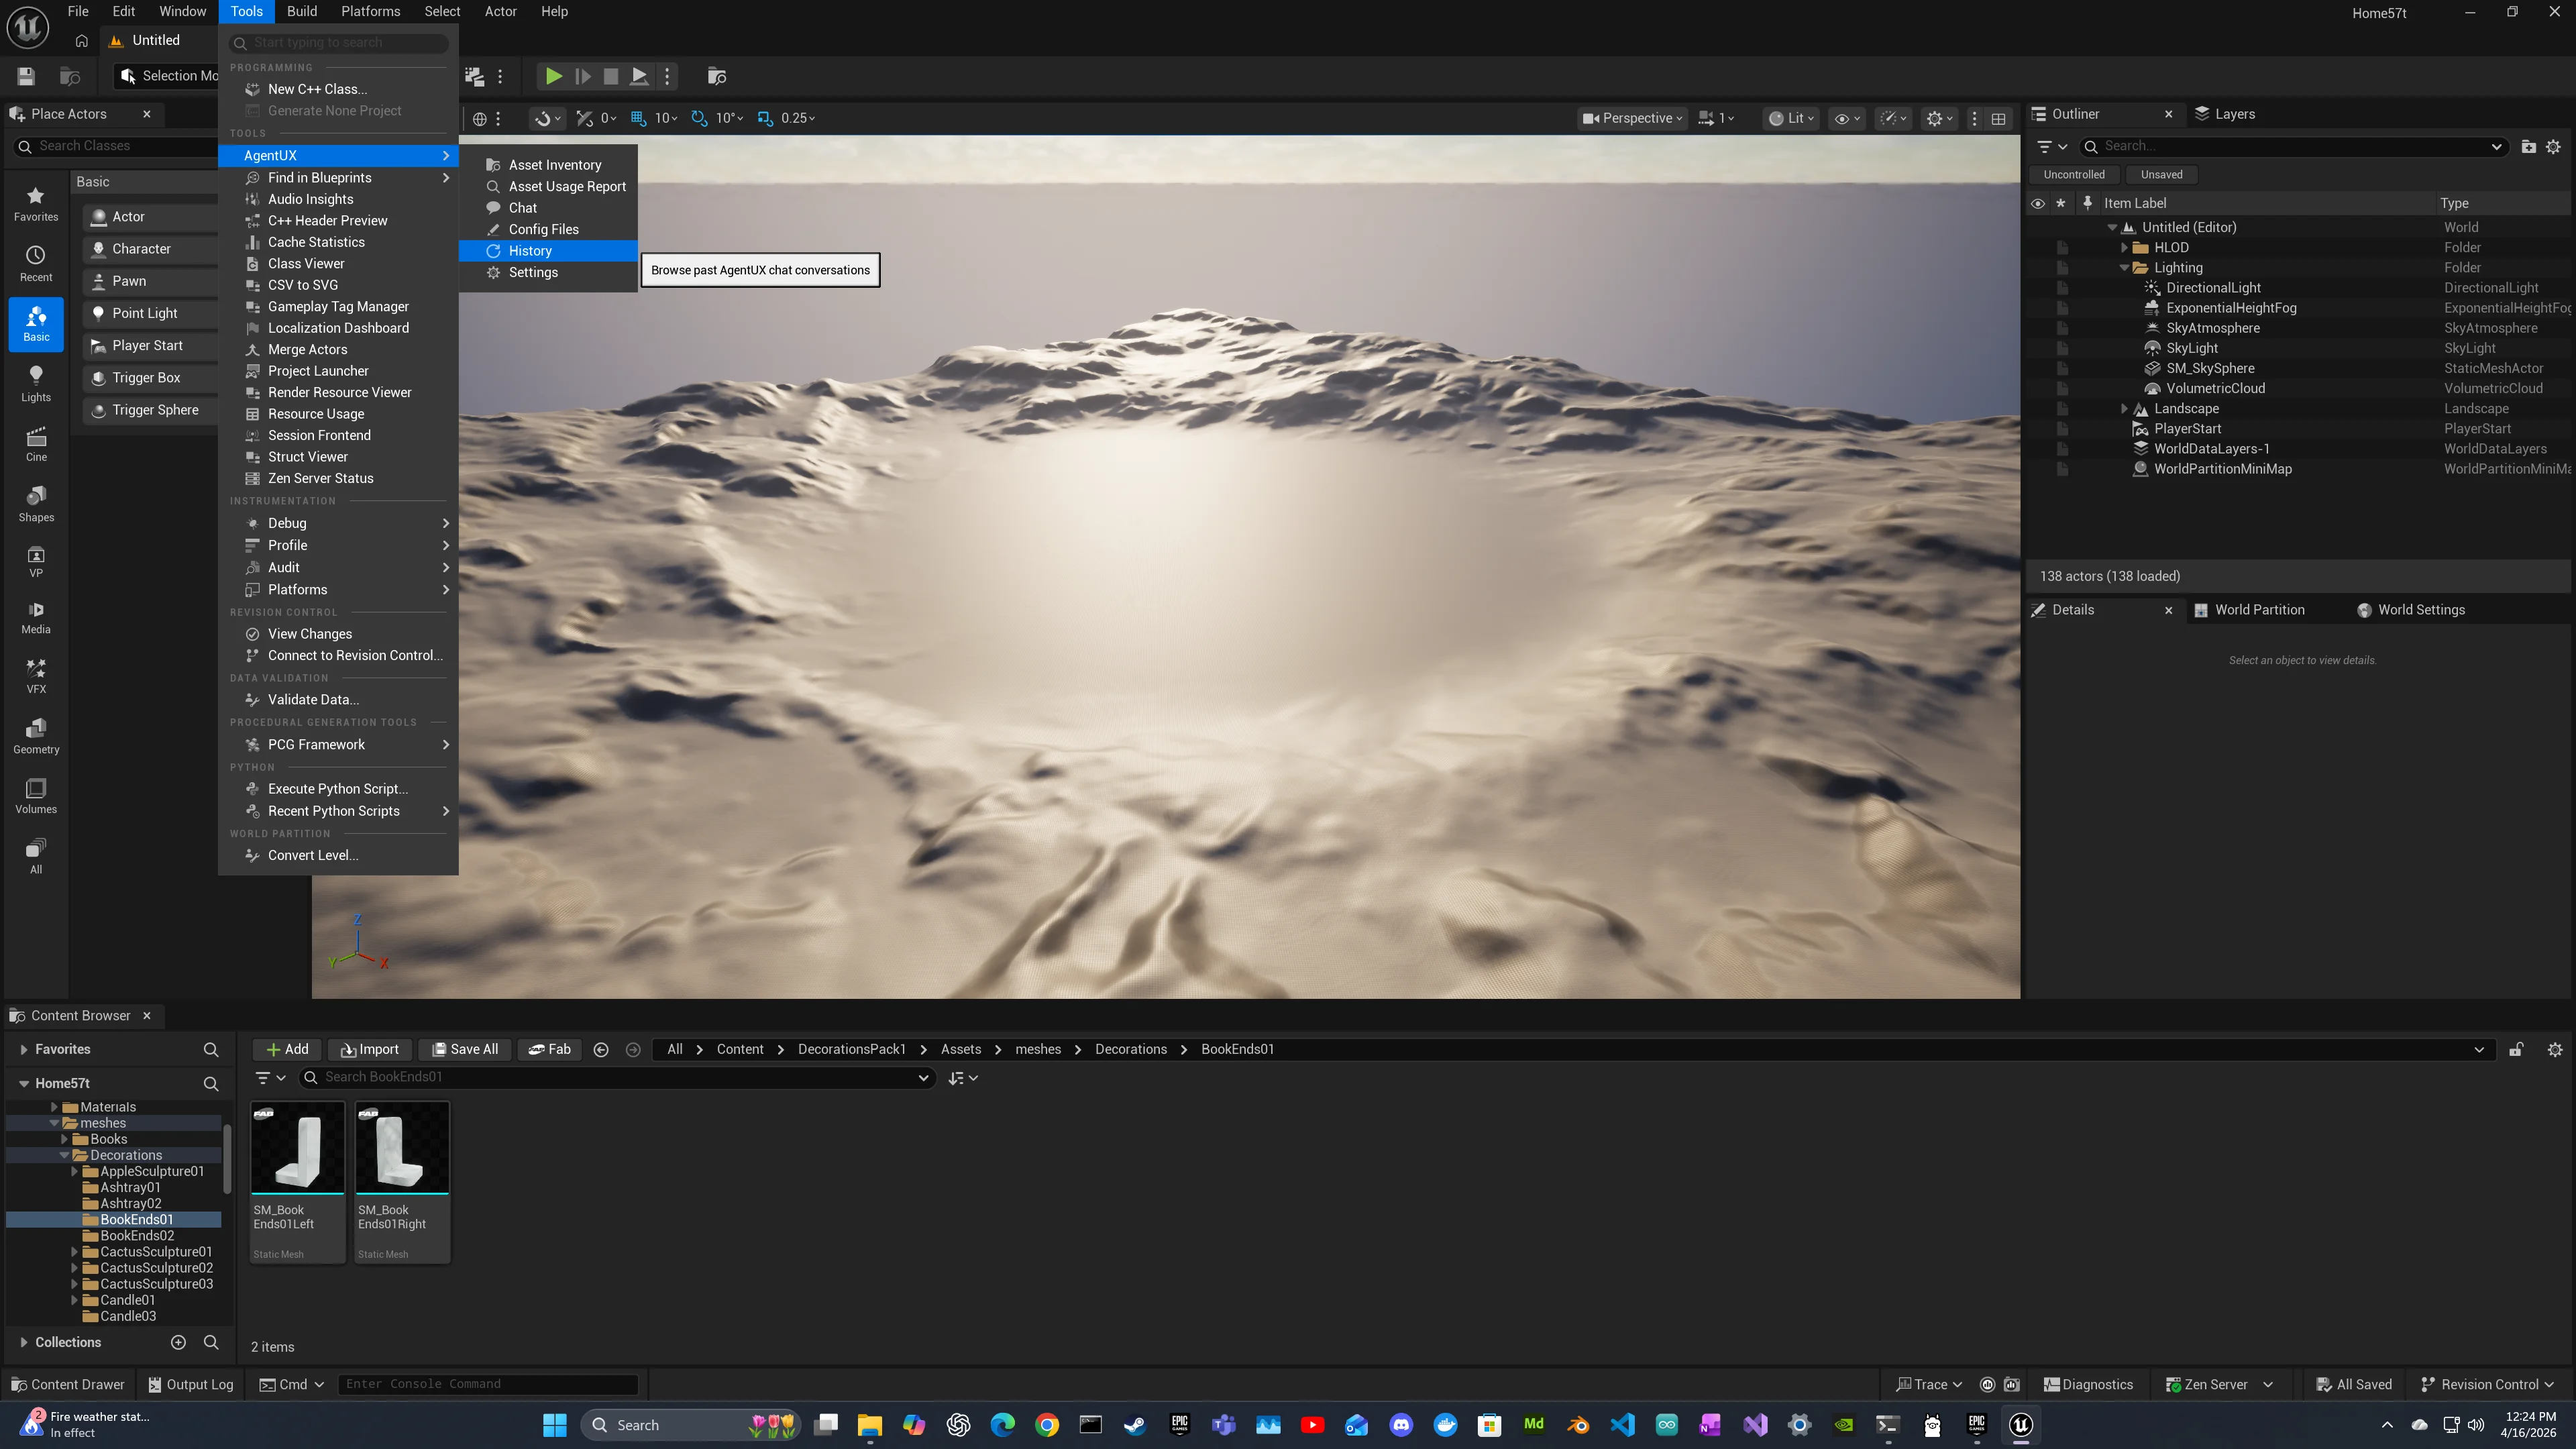
If the AgentUX window is not already open, you may have enable to plugin by selecting it. After selecting, you will have to restart the Editor to see the menu item.
AgentUX starts listening on port 9877 automatically. Verify in the Output Log:
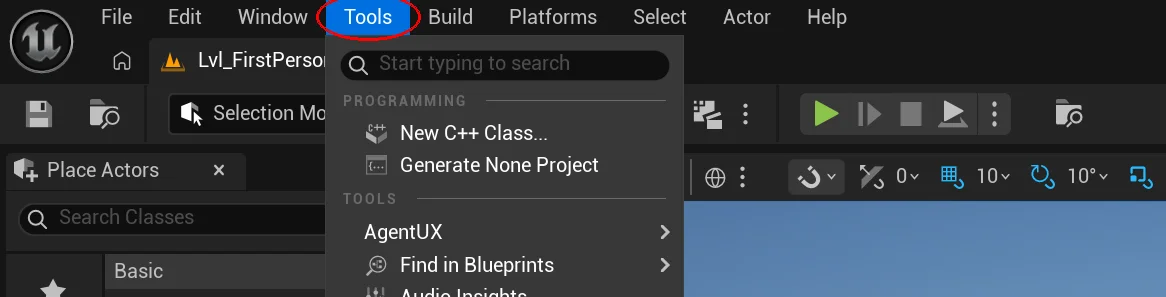
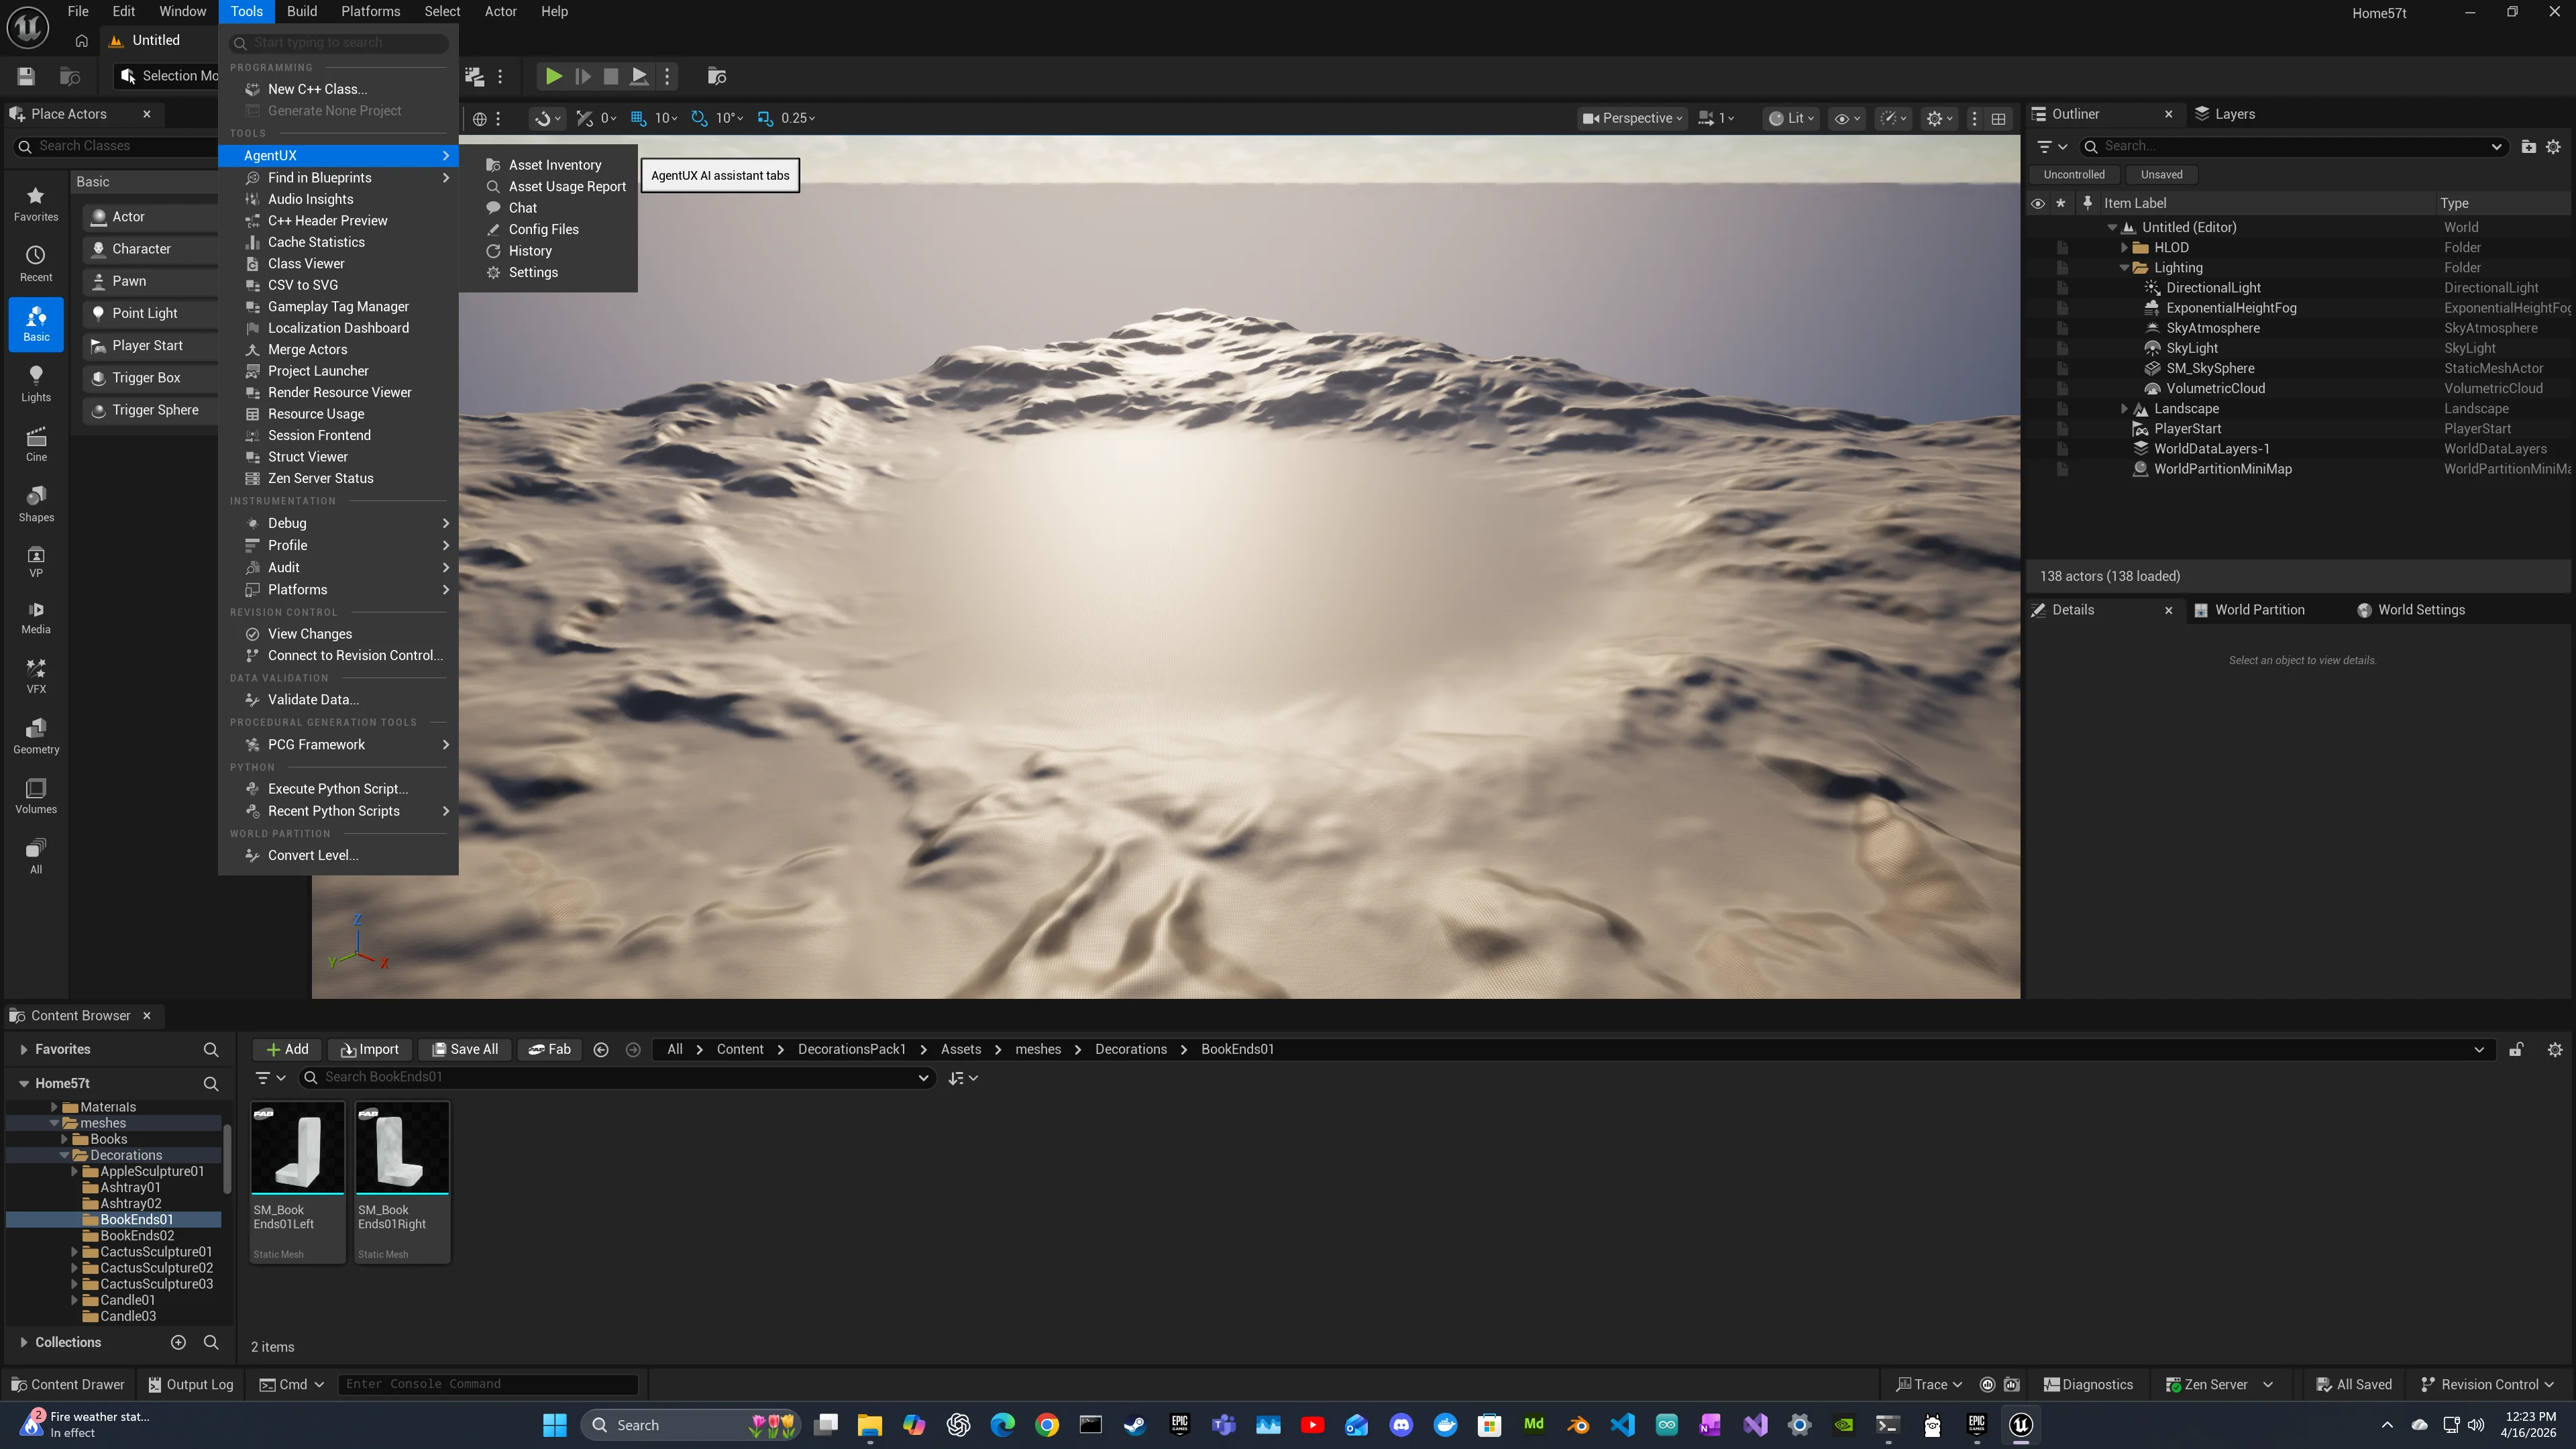
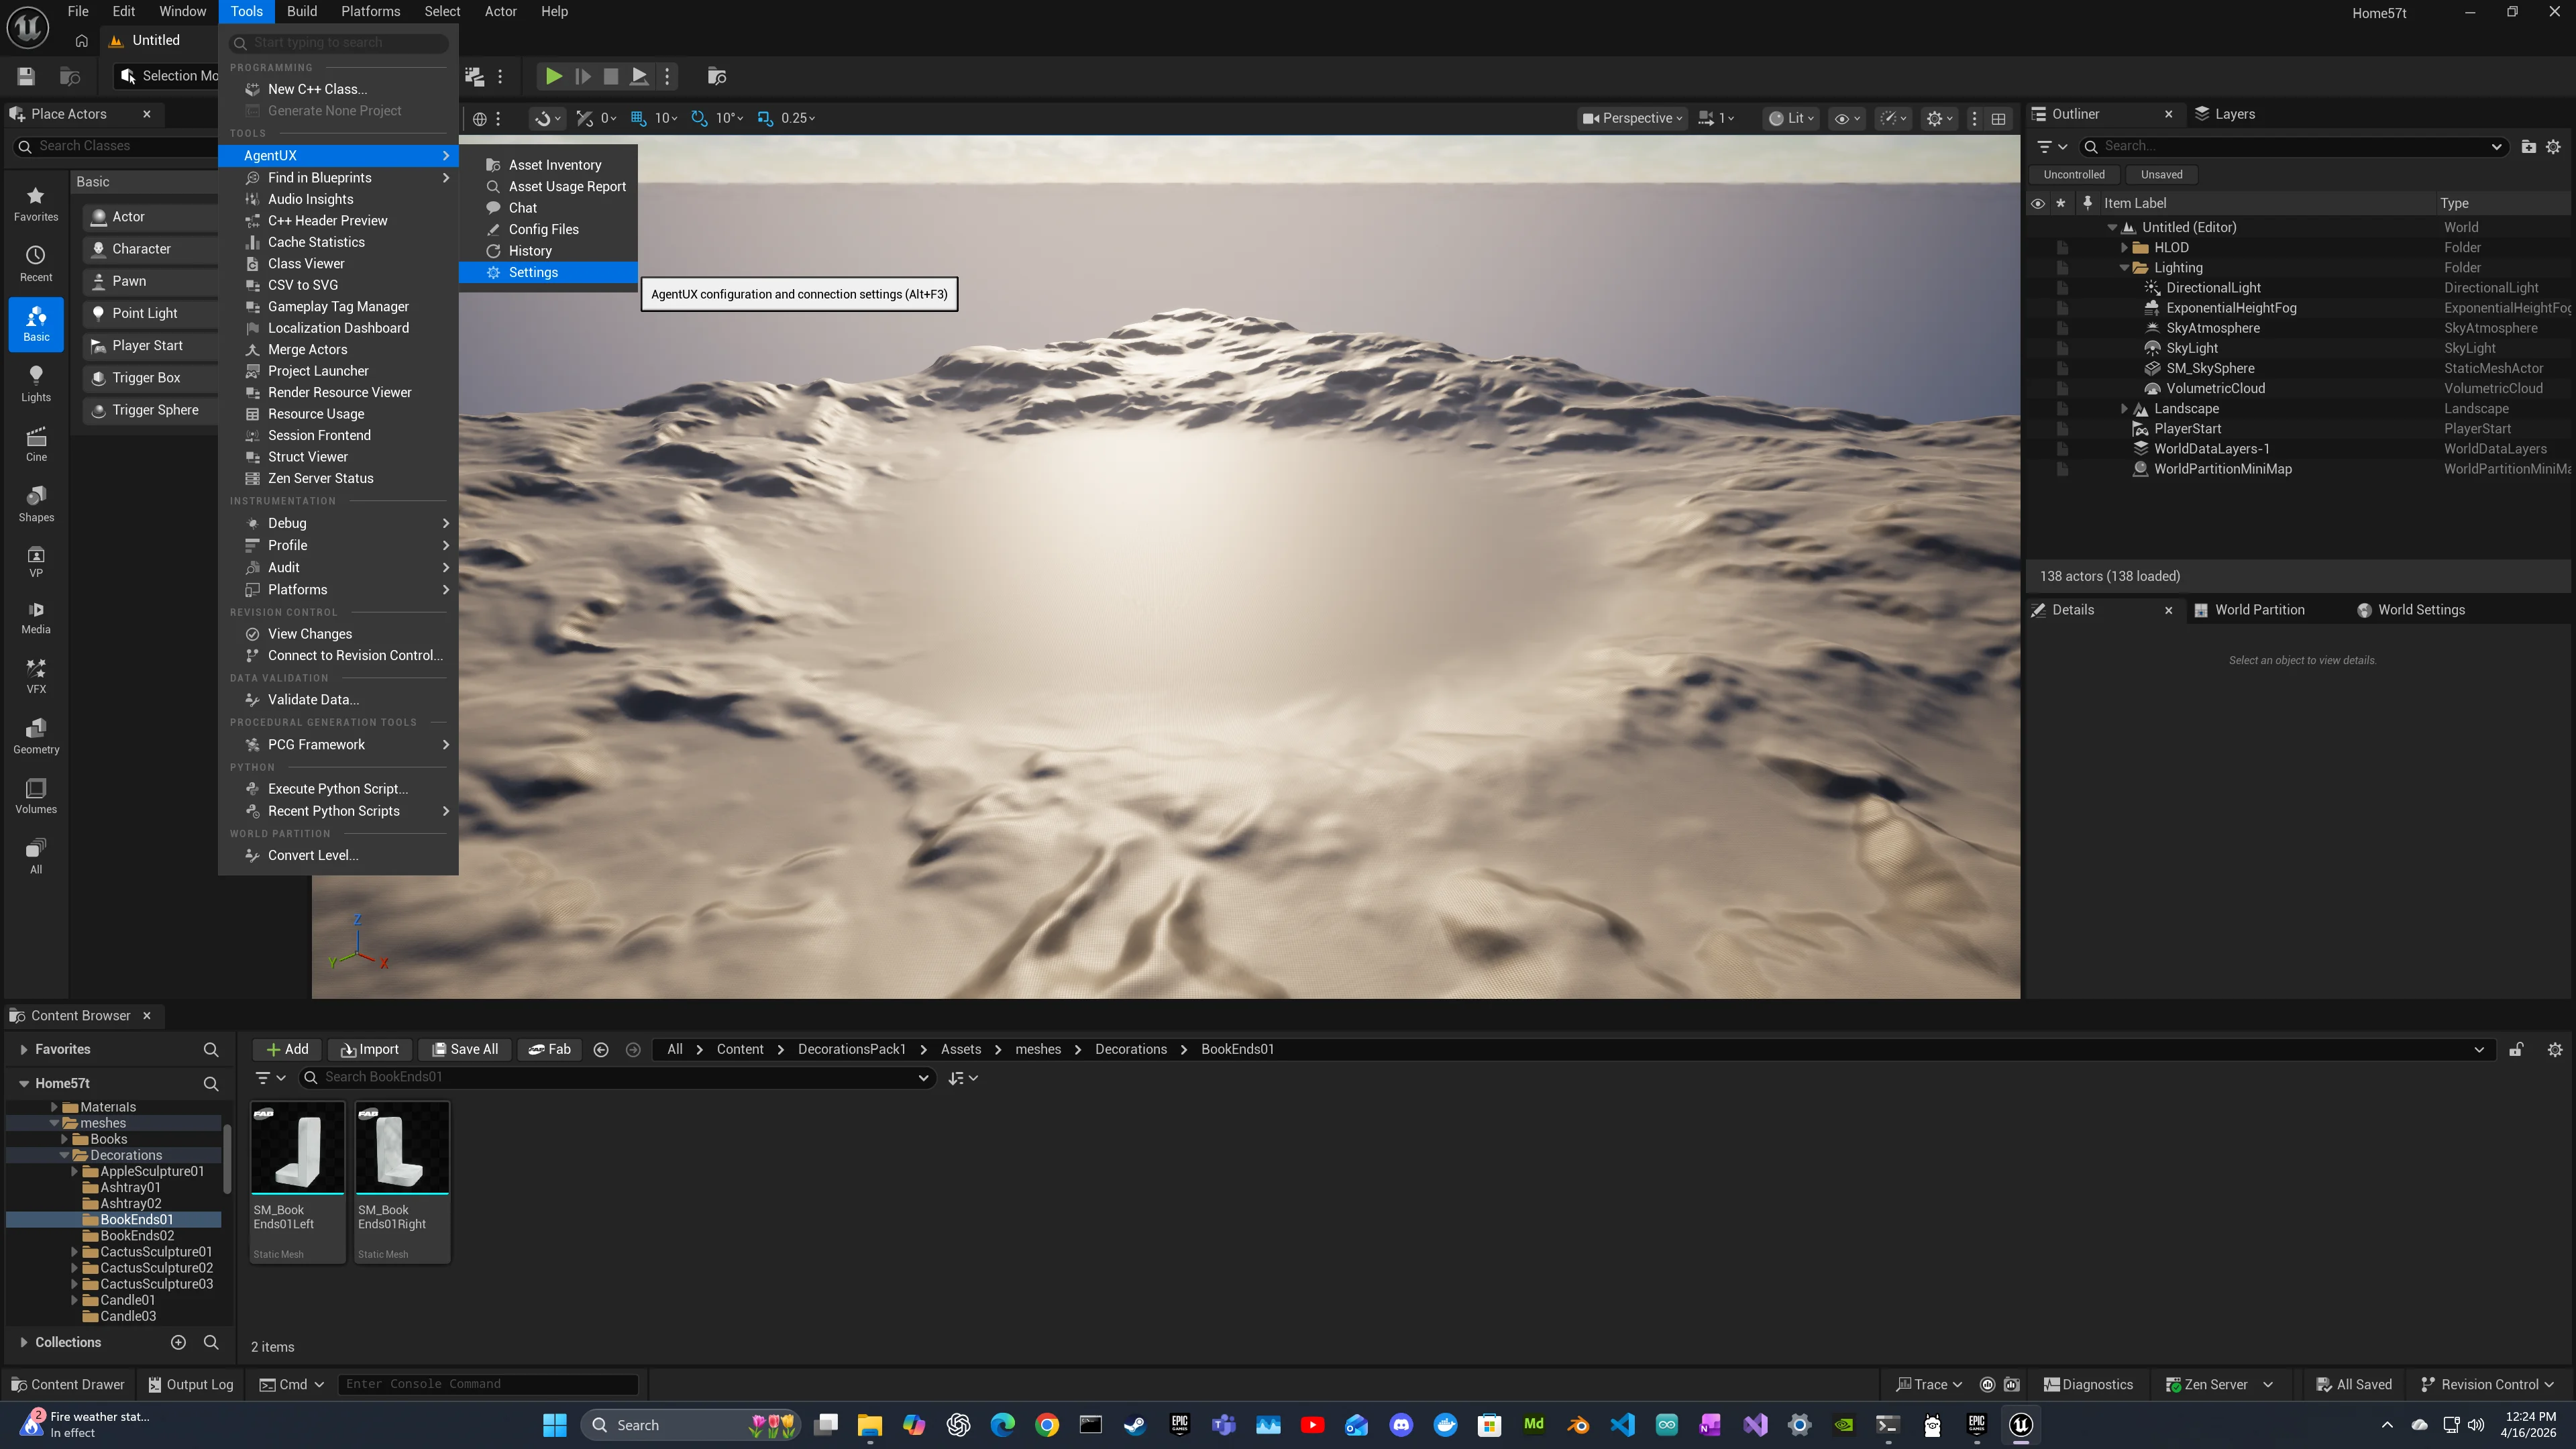
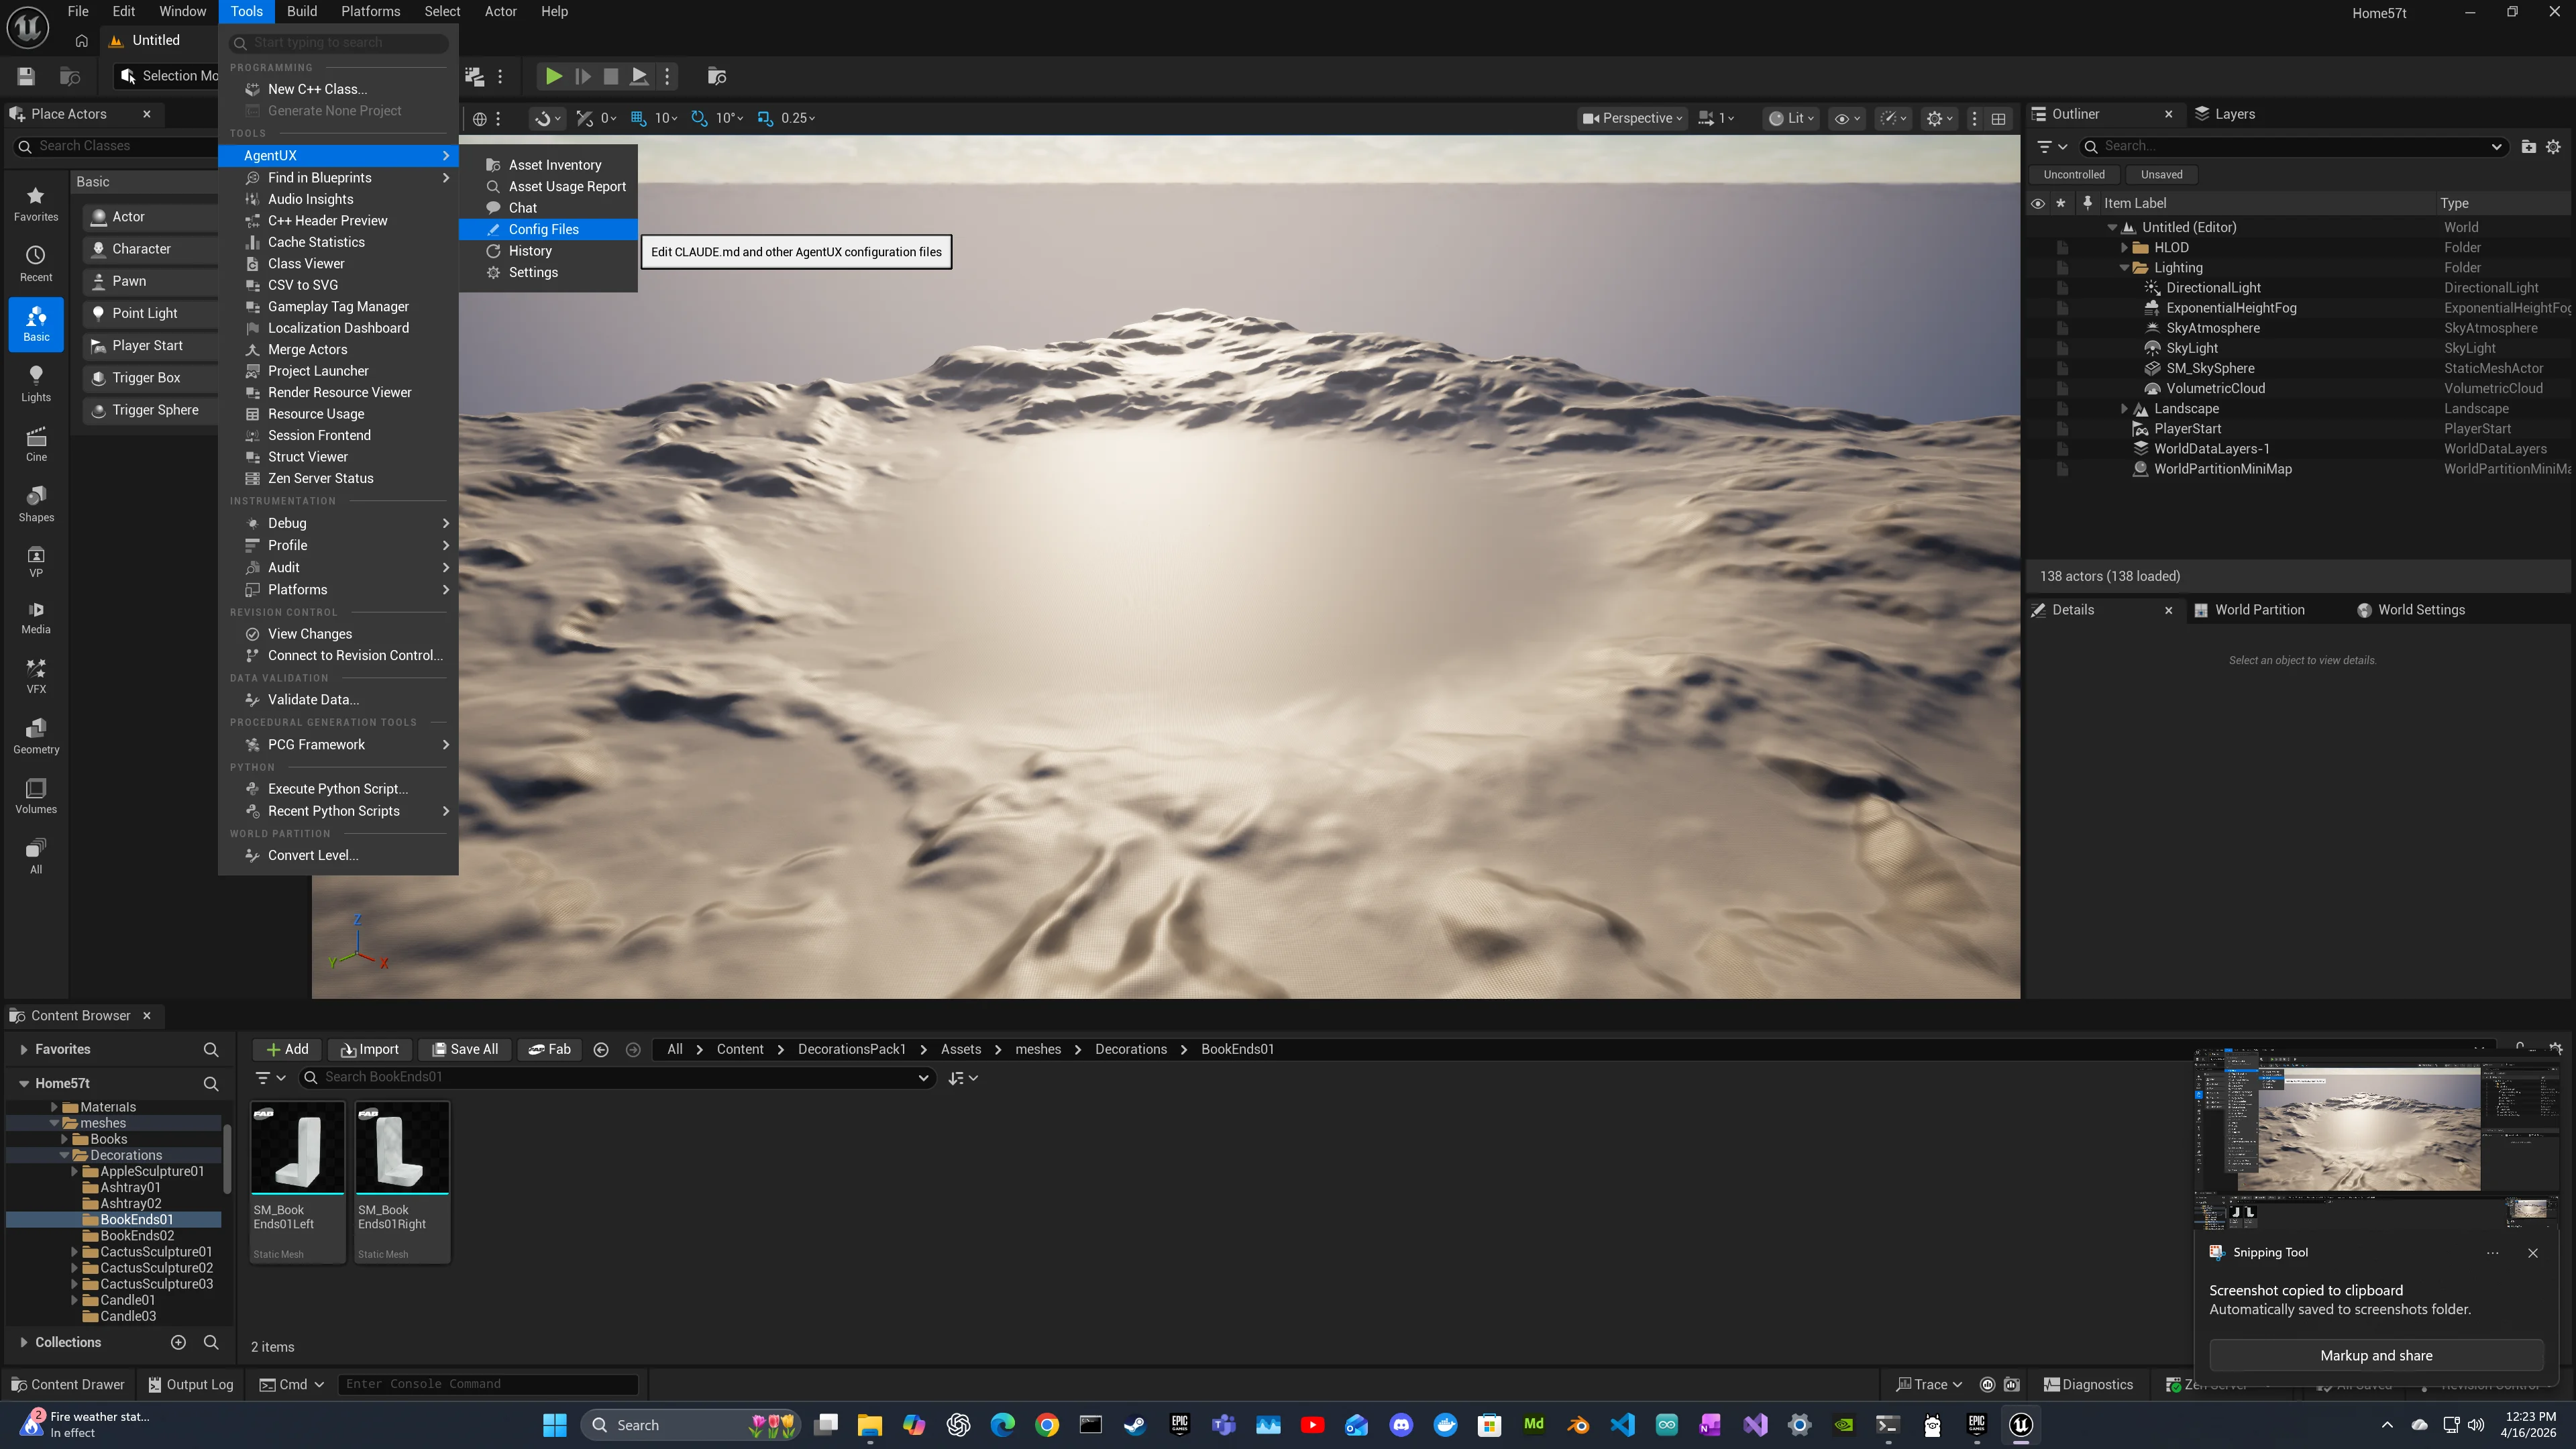
LogAgentUX: AgentUX WebSocket server listening on port 9877Once the plugin is enabled, open the AgentUX Chat window through the Tools menu.
First Commands
Test editor control by spawning an actor and positioning the camera:
[
  {
    "jsonrpc": "2.0", "id": 1,
    "method": "editor.actor.spawn",
    "params": { "class": "PointLight", "location": { "x": 0, "y": 0, "z": 300 } }
  },
  {
    "jsonrpc": "2.0", "id": 2,
    "method": "editor.viewport.setCamera",
    "params": {
      "position": { "x": -500, "y": 0, "z": 300 },
      "rotation": { "pitch": -15, "yaw": 0, "roll": 0 }
    }
  }
]
All mutating operations are wrapped in undo transactions: press Ctrl+Z or call editor.state.undo to reverse them.
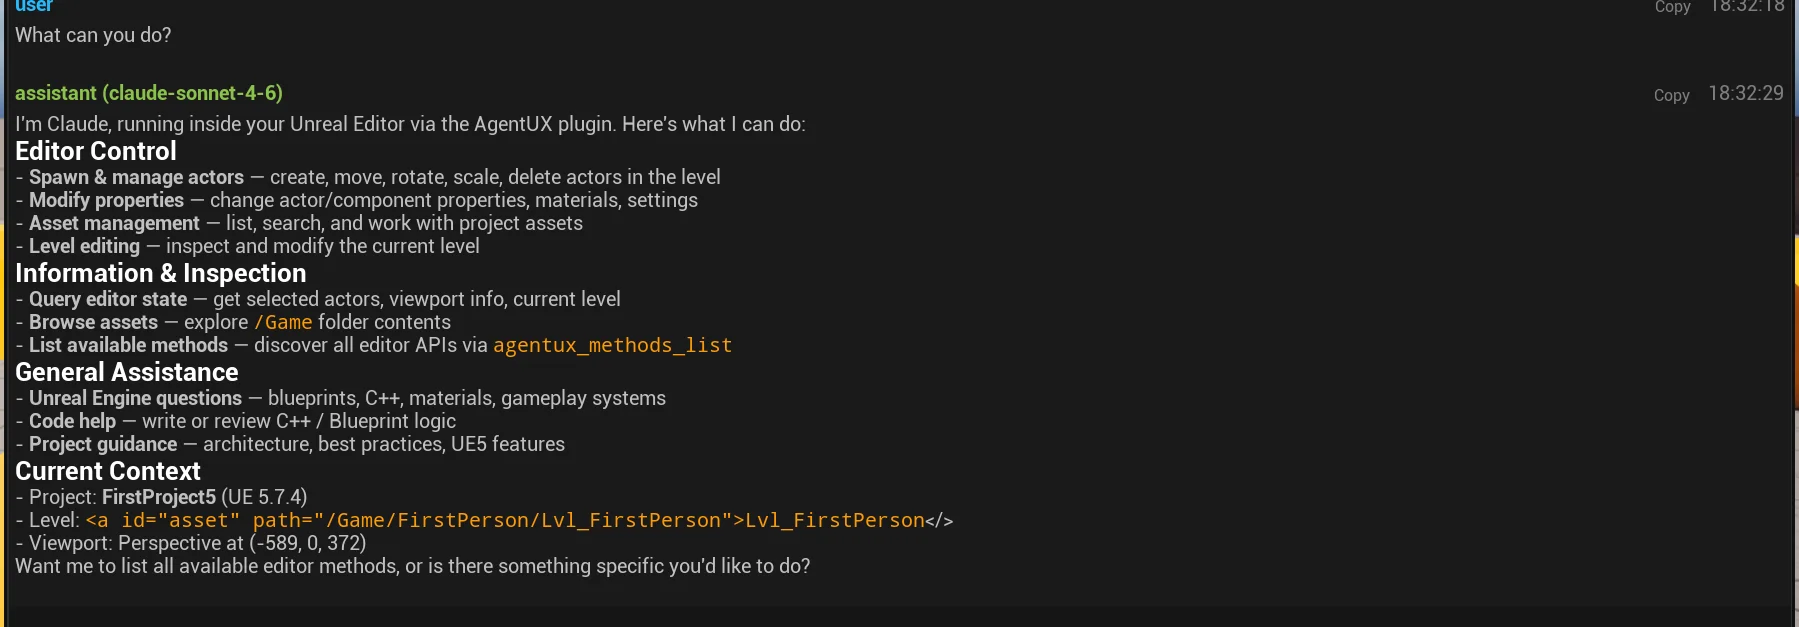
The Chat window is where you interact with Claude directly. You can type natural language requests, and Claude uses the MCP tools to control the editor on your behalf.
Prompts to Try (Free Edition)
Every example below works on the Free edition and stretches well past anything Remote Control can do on its own. The first two are pure natural language. The last two mix sentences with explicit JSON-RPC method names; that's a good shape when you want to nudge Claude toward a specific tool.
Sentence-only
1. Scene assembly + organization in one shot.
"Spawn 100 cubes in a 10 by 10 grid, 200 units apart on the X and Y axes. Group them into a layer called 'GridCubes'. Then add a directional light overhead with intensity 5. Save the level when you're done."
Claude composes editor.actor.spawn, editor.layers.create, editor.layers.assignActors, editor.actor.spawn for the light, editor.actor.setProperty for intensity, and editor.level.save. Single prompt, dozens of operations, all undo-able.
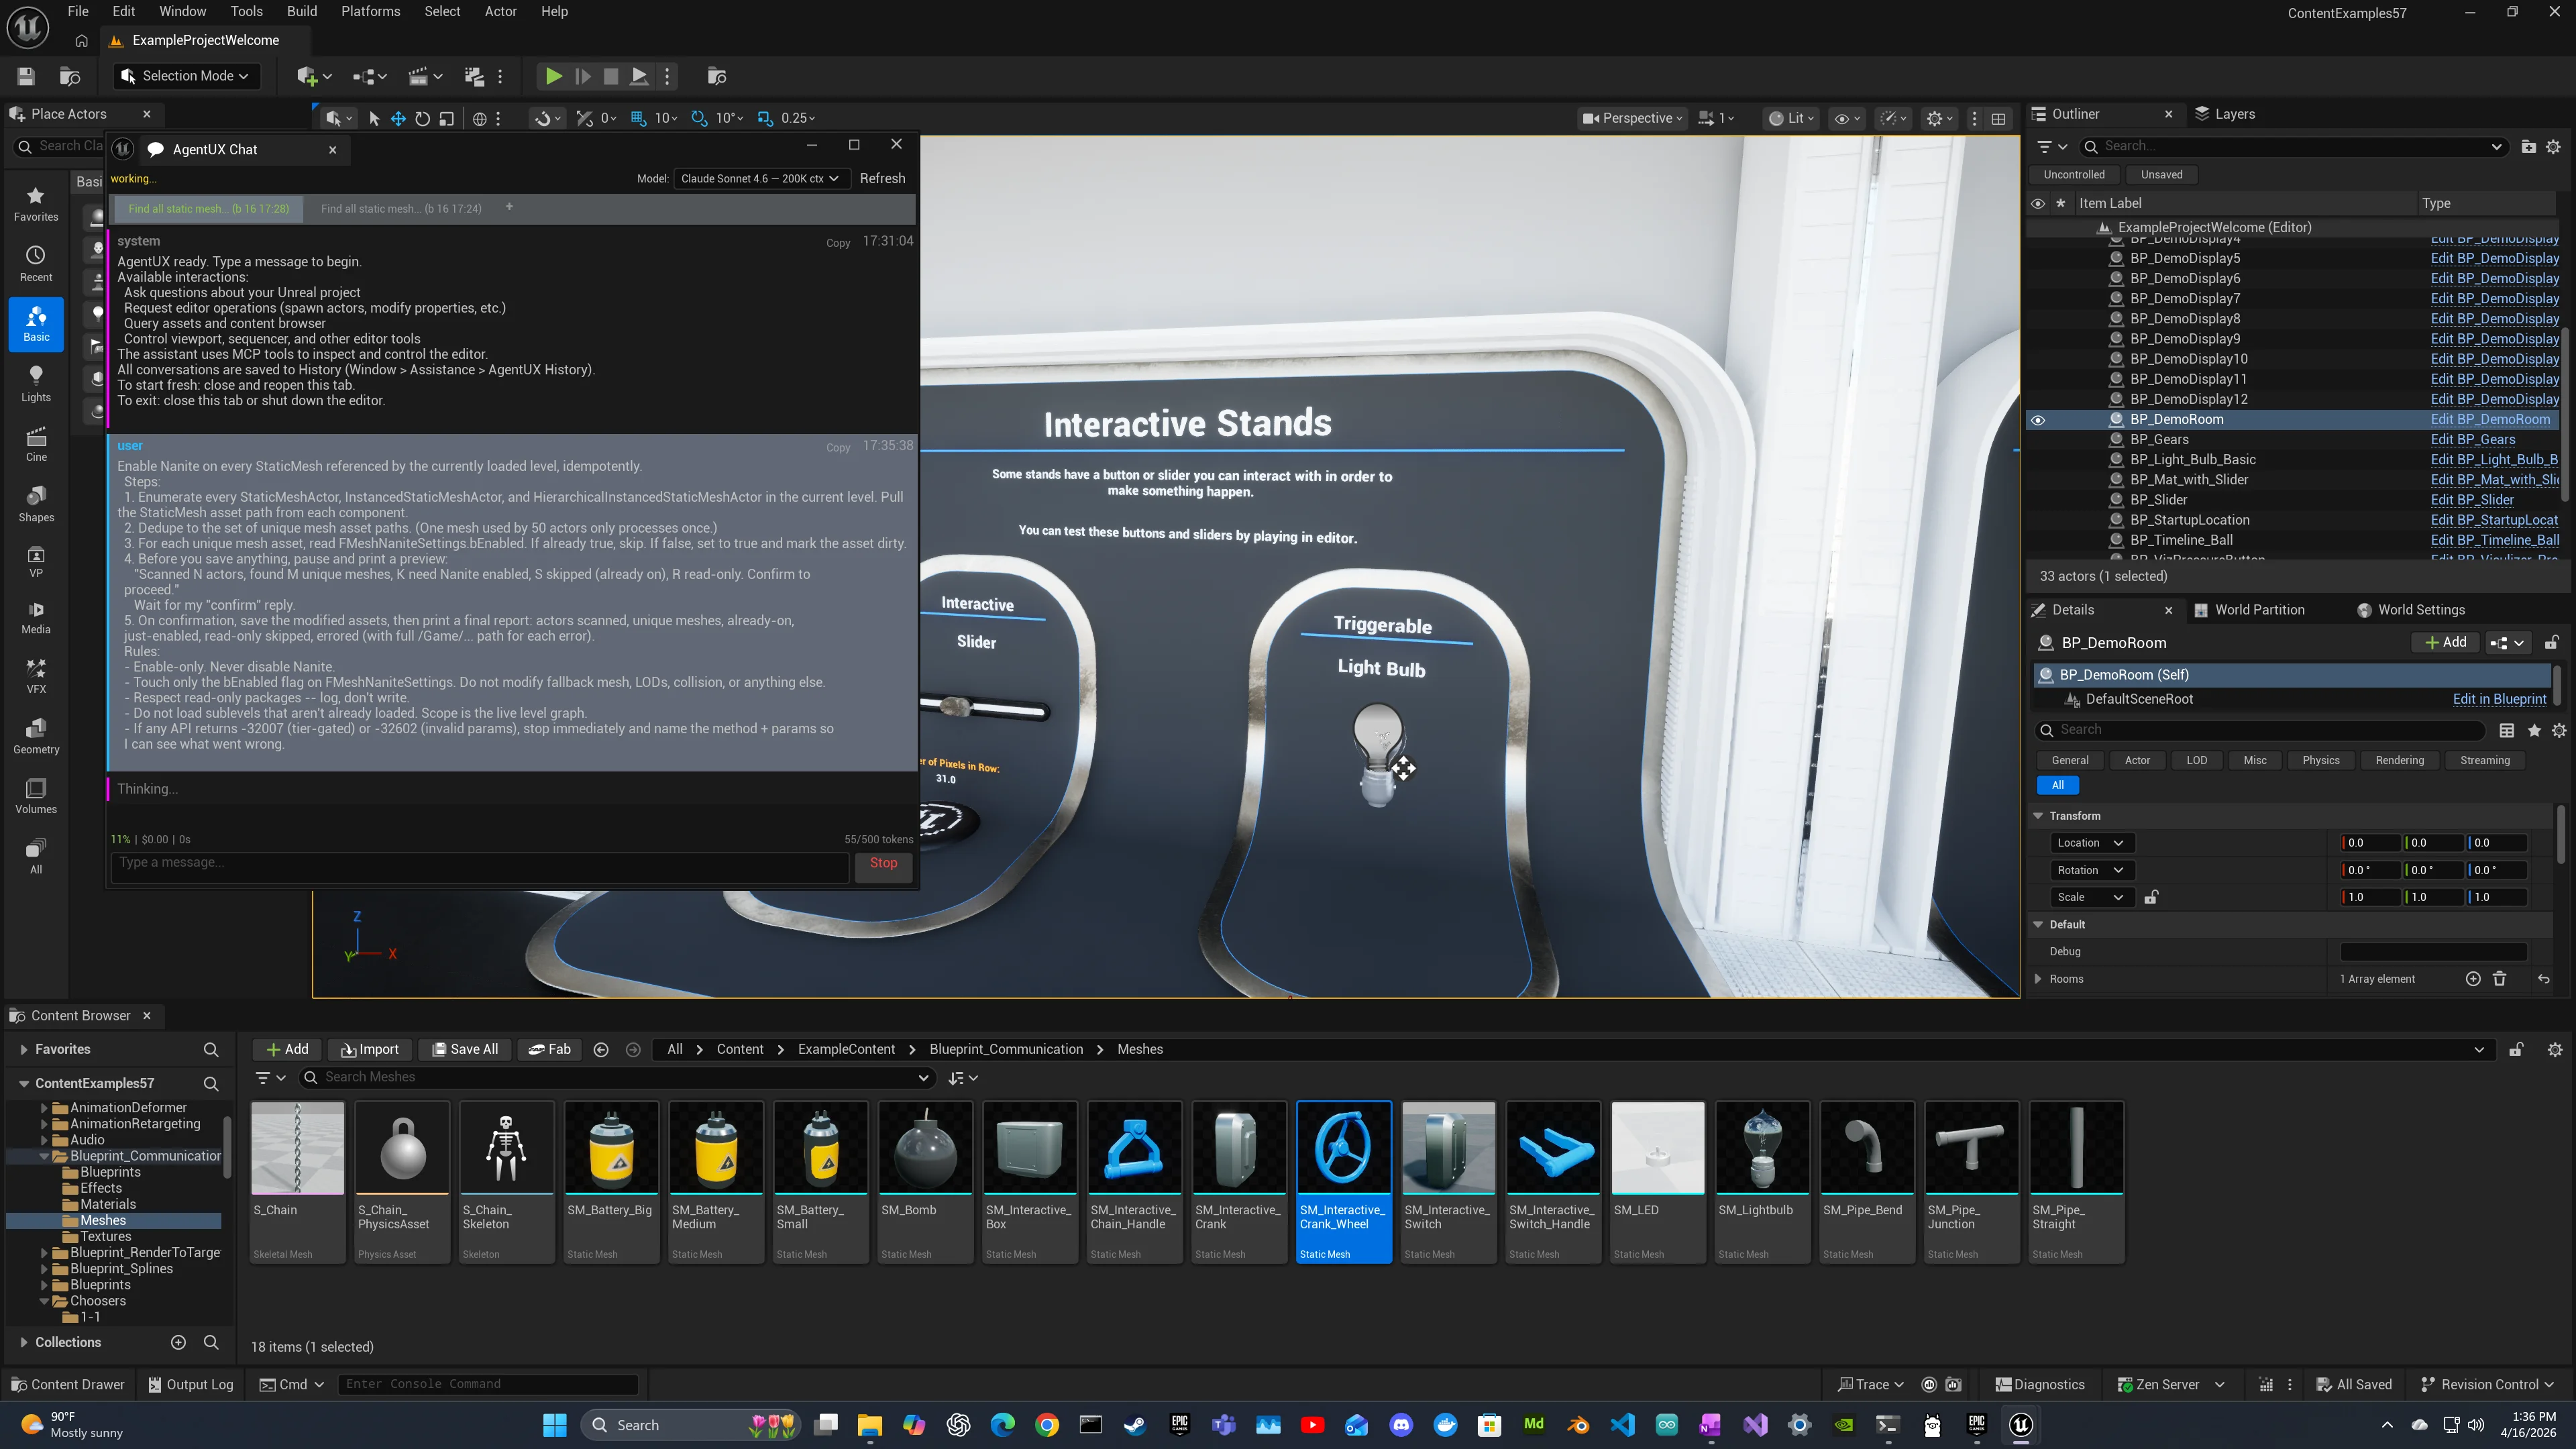
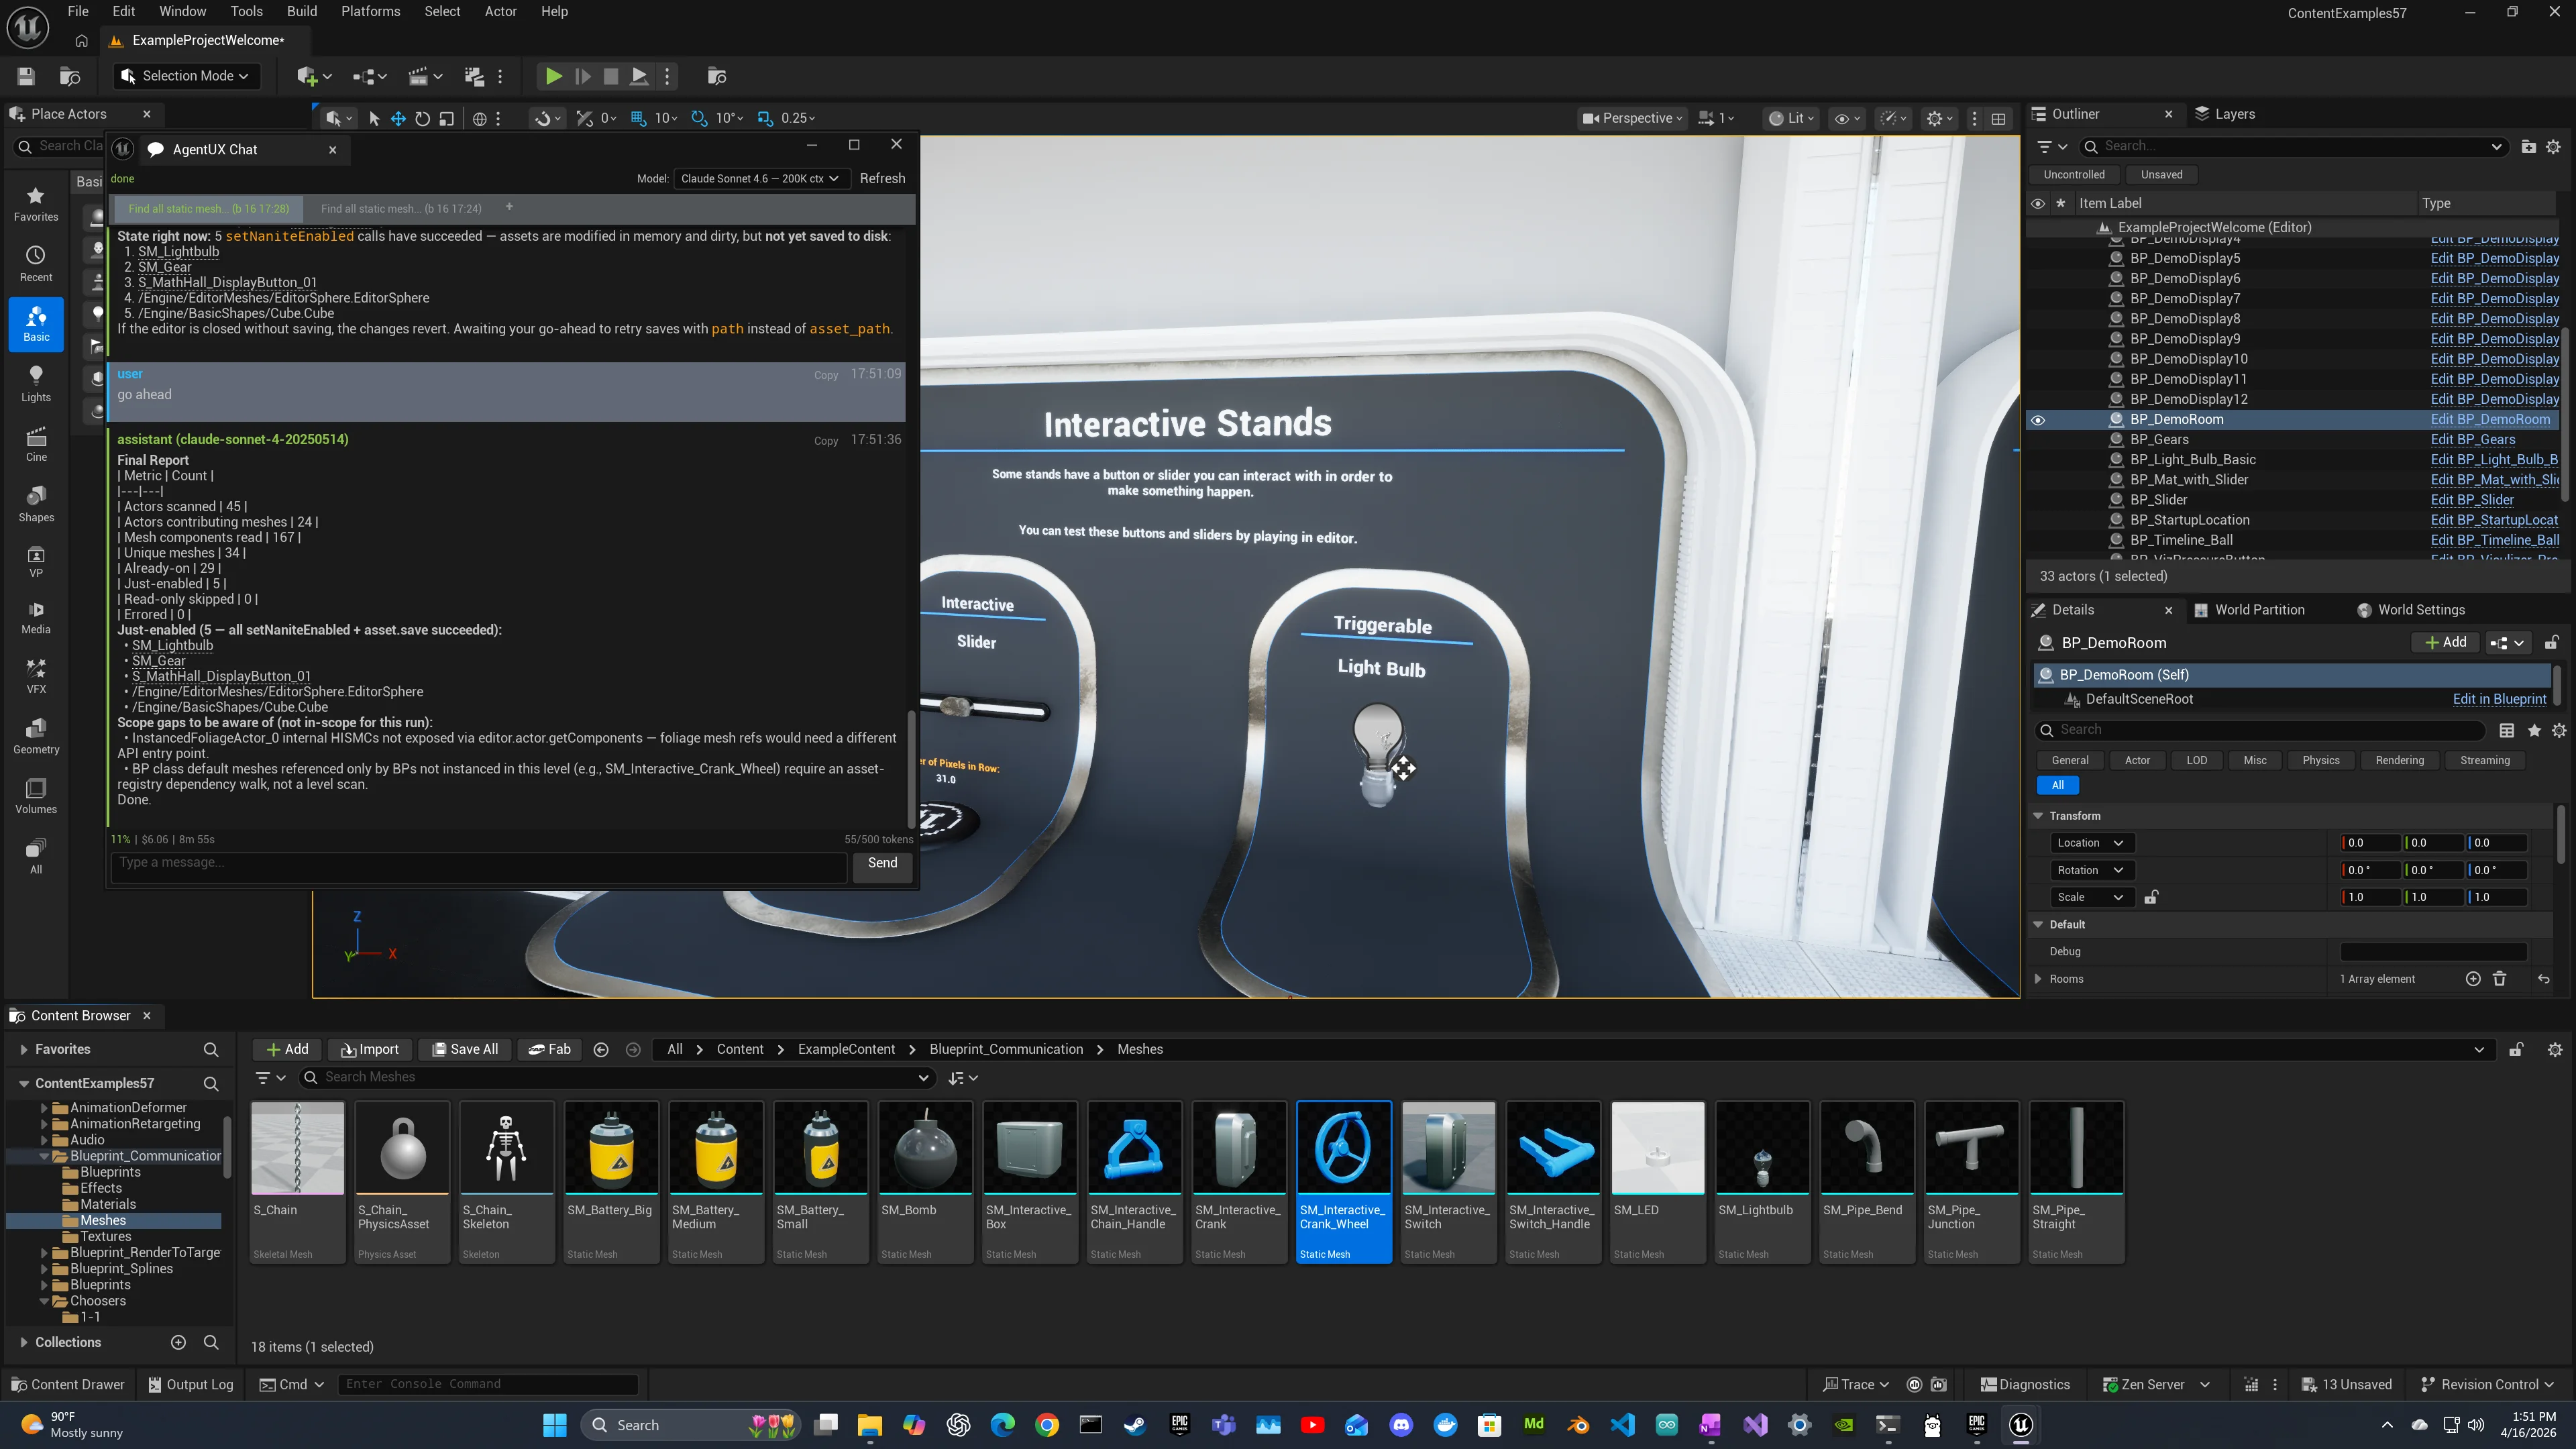
2. Bulk Nanite enablement across reused vegetation meshes.
"Scan this project's inventory and find every StaticMesh under 5,000 triangles that does NOT have Nanite enabled and is used in more than one project. Then enable Nanite on all of them and save."
Claude calls editor.inventory.scanProject, polls editor.inventory.getScanStatus, runs editor.inventory.getUsageReport(min_project_count=2), narrows the result with editor.inventory.listAssets filtered to className=StaticMesh, then loops editor.staticmesh.setNaniteEnabled(unreal_path, enabled=true) over each match and finishes with editor.asset.save. Two-sentence prompt, dozens-to-hundreds of mesh edits, zero Content Browser clicks. The manual equivalent is most of an afternoon for a typical Megascans pack. Remote Control can't reach the Nanite settings or scan across projects at all; this is a Free-tier capability AgentUX adds.
Mixed (sentence + explicit tools)
3. Blueprint generation with named methods.
"Build a Blueprint named BP_HealthSystem at /Game/Blueprints/. Give it a float MaxHealth (default 100) and a float CurrentHealth (default 100). Add a function Damage(int Amount) that subtracts Amount from CurrentHealth and prints the new value. Add an event OnDeath that fires when CurrentHealth hits zero. Use editor.blueprint.create, editor.blueprint.addVariable, editor.blueprint.addFunction, editor.blueprint.addEvent, editor.blueprint.compile, then editor.asset.save (always save before compile)."
Naming the methods anchors Claude on the right surface and keeps long Blueprint generation sequences from drifting. Free edition handles all of this.
4. Inventory cleanup with safety gate.
"Find every InventoryAsset under /Game/Megascans/ that hasn't been seen in any project membership for more than 30 days. Use editor.inventory.listAssets to get the candidates, then propose a cleanup plan I can review. Don't delete anything yet; I'll run inventory_cleanup.py with the --search/--purge token gate."
Mixes natural-language analysis with explicit tool naming and an explicit safety boundary (Claude proposes, you execute the destructive CLI). Pattern works for any "find then review then act" workflow.
The Synergy: Tokens Once, Free Forever
Whatever Claude does for you in a chat session, you can capture as a Python script, an editor hook, or a CLI command. The methods are pure JSON-RPC; nothing about them depends on a model being in the loop. So the work pattern is: you spend tokens letting Claude figure out the right sequence the first time, then you save that sequence as a script that runs again whenever you need it at zero token cost. Inventory scans, Blueprint scaffolds, Movie Render Queue jobs, environment setup with the Water and Atmosphere handlers, batch material updates: any of them can graduate from "Claude did it once" to "the script does it on every project, forever, free."
This is also why the Community script library matters even if you've never bought Pro. Scripts that other AgentUX users wrote (often with Pro tokens) run on your Free install with no token cost to you. Browse the script catalog.


Docking the Chat Window
The AgentUX Chat window is a standard Unreal Editor tab. You can dock it alongside the viewport, Content Browser, or any other panel in your layout.
To dock the window:
- Click and drag the tab header where it says "AgentUX Chat" next to the X button. Only the tab header text triggers docking -- clicking elsewhere on the title bar will not work.
- As you drag, the editor dims and shows docking guide brackets indicating where the window will land when you release the mouse.
- Drop the tab onto the guide for your preferred position (left, right, bottom, or stacked with another tab).
To undock, drag the tab header away from its docked position. If you release where no docking guide appears, the window returns to a resizable floating state. The editor remembers your layout between sessions.
A common layout is docking AgentUX Chat to the right of the viewport, giving you a side-by-side view of the scene and the conversation. Another option is docking it as a tab alongside the Output Log at the bottom.
Using Claude Code externally (recommended)
The in-editor Chat window is convenient for quick tasks, but AgentUX also works with Claude Code in a separate terminal window. This is actually the recommended workflow for serious work, and here's why:
- 1M token context window vs the smaller context available in the editor chat. You can hold an entire project's API surface in a single session.
- Better scrolling and history navigation. Claude Code's terminal UI makes it easy to review long conversations, copy code blocks, and search through output.
- Custom status line showing context usage, model, and session stats at a glance.
- Full MCP tool access. Claude Code connects to the same AgentUX and GraphRAG MCP servers. Every editor control method and knowledge base tool works identically.
- No viewport competition. The editor viewport gets your full screen while Claude Code runs alongside in its own window. Alt-Tab between them, or put them on separate monitors.
The in-editor chat is good for demos and quick queries. For multi-step workflows, Blueprint generation, or long sessions, the external Claude Code terminal is the better experience.
Both approaches connect to the same plugin over WebSocket. You can even use both simultaneously: one session running in the editor chat for quick queries while another runs in Claude Code for a longer workflow.
Built-in Safety Guards
I spent a lot of time on crash prevention. AgentUX has a two-layer safety system:
- Layer 1: Hardcoded Guards (always active): Static checks block dangerous operations before they reach the engine. Examples: saving during PIE, modifying a dying actor, compiling a Blueprint mid-compilation.
- Layer 2: GraphRAG-Enhanced (when Engine Knowledge is connected): Queries the knowledge base for known assertions and preconditions, covering thousands of edge cases from
check()andensure()calls in the engine source.
Every safety error includes an actionable remediation message: the AI receives instructions like "Cannot save while PIE is running. Call editor.pie.stop first, then retry."
You can proactively check safety:
{ "jsonrpc": "2.0", "id": 1, "method": "agentux.safety.check", "params": { "operation": "editor.level.save" } }MCP Tools Available
| MCP Server | Tool | Description |
|---|---|---|
| agentux | agentux_ping | Health check: returns plugin version and uptime |
| agentux | agentux_methods_list | List all 662 JSON-RPC methods |
| agentux | agentux_raw | Send any JSON-RPC method with parameters |
| agentux | agentux_inventory_* | 7 wrappers for the editor.inventory.* namespace (scan, list, find usages, migrate, usage report, sync to Neo4j) |
| agentux | agentux_graphrag_status | Check GraphRAG connectivity |
| ue-graphrag | 34 tools | Source search, class details, hierarchy, API surface, docs, versioning, experience system, and more |
Next Steps
- Installation Guide: Detailed setup for all components
- API Reference: Complete reference for all 662 methods across 45 handlers
- GraphRAG Guide: Full knowledge base reference and workflows
- Recipes: Multi-step workflow examples