Installation
Detailed setup for the AgentUX plugin, MCP bridge, and optional GraphRAG knowledge base.
Prerequisites
Community edition: You only need Unreal Engine and Python. No Java, no Neo4j. All 45 handlers and 662 methods included.
Pro / Team Studio editions: You'll also need Java and Neo4j for the knowledge base.
| Requirement | Version | Required For | Notes |
|---|---|---|---|
| Unreal Engine | 5.6+ (5.7 recommended) | Editor Control | Retail (Epic Games Launcher) or source build. Full features (662 methods) on 5.7+. Core features (577 methods) on 5.6. |
| Python | 3.10+ | MCP Bridge + GraphRAG | python --version to check |
| Neo4j Community | 5.x | Engine Knowledge | Optional, only needed for GraphRAG |
| Java | 21+ | Neo4j runtime | Optional, required by Neo4j Community Server |
| Node.js | 20+ | Bridge-v2 (API bridge) | Optional. For programmatic Anthropic API access when the CLI is not available |
Prerequisite Details
Here's what each dependency does and how to check if you have it. Better to sort this out before you start the installer.
Python 3.10+
Runs the MCP bridge (connects Claude Code to the plugin) and the GraphRAG server. The installer creates a virtual environment, so your system Python won't be modified.
- Check:
python --versionorpython3 --version - Install: python.org/downloads or your system package manager
Java 21+
Neo4j is a Java application. It won't start without a JDK installed. You need the full JDK, not just the JRE.
- Check:
java -version - Install: Eclipse Temurin (adoptium.net) or Oracle JDK
- Edition: Only needed for Pro and Team Studio (Free doesn't use Neo4j)
Neo4j Community 5.x
Stores the engine knowledge graph: class hierarchies, function signatures, module relationships, and everything else your AI needs to verify UE APIs. Runs as a local service on your machine.
- Check:
neo4j --versionor visitlocalhost:7474in a browser - Install: neo4j.com/download (choose "Community Edition", free and open source)
- Resources: ~512MB RAM idle, ~1-2GB under query load. The AgentUX installer handles all Neo4j configuration automatically.
- Edition: Only needed for Pro and Team Studio (Free doesn't use Neo4j)
Node.js 20+ (optional)
Only needed for Bridge-v2 (the API bridge). Bridge-v2 lets you call the Anthropic API directly to control the editor, for use in CI/CD pipelines or custom automation where the Claude Code CLI is not available. Most users don't need this. The standard Python bridge handles all CLI-based workflows.
- Check:
node --version - Install: nodejs.org
Step 1: Plugin Installation
Recommended: Engine-Level Install
Install AgentUX at the engine level so it is available to all projects using that engine version. The knowledge base (Neo4j + LanceDB) is shared engine knowledge, not project-specific data, so a single install serves every project.
Retail / Epic Games Launcher:
<UE Install>/Engine/Plugins/Marketplace/AgentUX/The pre-compiled binaries in Binaries/Win64/ are loaded automatically. No compilation needed.
Source Build:
<UE Root>/Engine/Plugins/Experimental/AgentUX/Build the plugin (from a terminal in your UE root):
Engine/Build/BatchFiles/Build.bat UnrealEditor Win64 Development -Module=AgentUXThis incremental build takes approximately 10 seconds.
Chat history, auth credentials, and MCP configuration are stored per-project in <Project>/Saved/AgentUX/ regardless of where the plugin is installed.
Alternative: Per-Project Install
If you need different AgentUX versions across projects, install into a single project instead:
<YourProject>/Plugins/AgentUX/This duplicates the knowledge base files for each project. Use this only when version isolation is required.
Enable the Plugin
Add to your project's .uproject file:
{
  "Plugins": [
    { "Name": "AgentUX", "Enabled": true }
  ]
}
Optional Plugin Dependencies
AgentUX works out of the box with just the core editor. Specialized handlers for VFX, cinematics, procedural generation, and other domains require the corresponding UE plugin to be enabled. If a handler's backing plugin is disabled, it returns a clear error message instead of crashing.
Commonly used optional plugins: Niagara (VFX), PCG (procedural generation), Level Sequence Editor (cinematics), Movie Render Pipeline (offline rendering), MetaSound (procedural audio). See the Troubleshooting page for the full handler-to-plugin mapping.
Step 2: Run the Installer
From the AgentUX root directory:
python install.pyThe installer performs the following steps:
- Installs Python dependencies (Bridge + GraphRAG)
- Detects Neo4j (if running) and configures credentials
- Restores the pre-built knowledge base into Neo4j
- Validates the ONNX embedding model
- Generates MCP configuration for Claude Code
- Configures the Home Project directory (interactive prompt or via the
--home-projectflag for scripted installs) - On Pro or Team Studio tiers with Neo4j reachable and a populated local Asset Inventory catalog, recommends running
sync_inventory_to_neo4j.pyto mirror the catalog into Neo4j (informational only; never blocks the installer) - Creates an AgentUX workspace under your Home Project (interactive prompt; sets up
.uproject,.mcp.json,.claude/, andconfig.yaml)
For non-interactive installs:
python install.py --home-project "/path/to/your/HomeProject"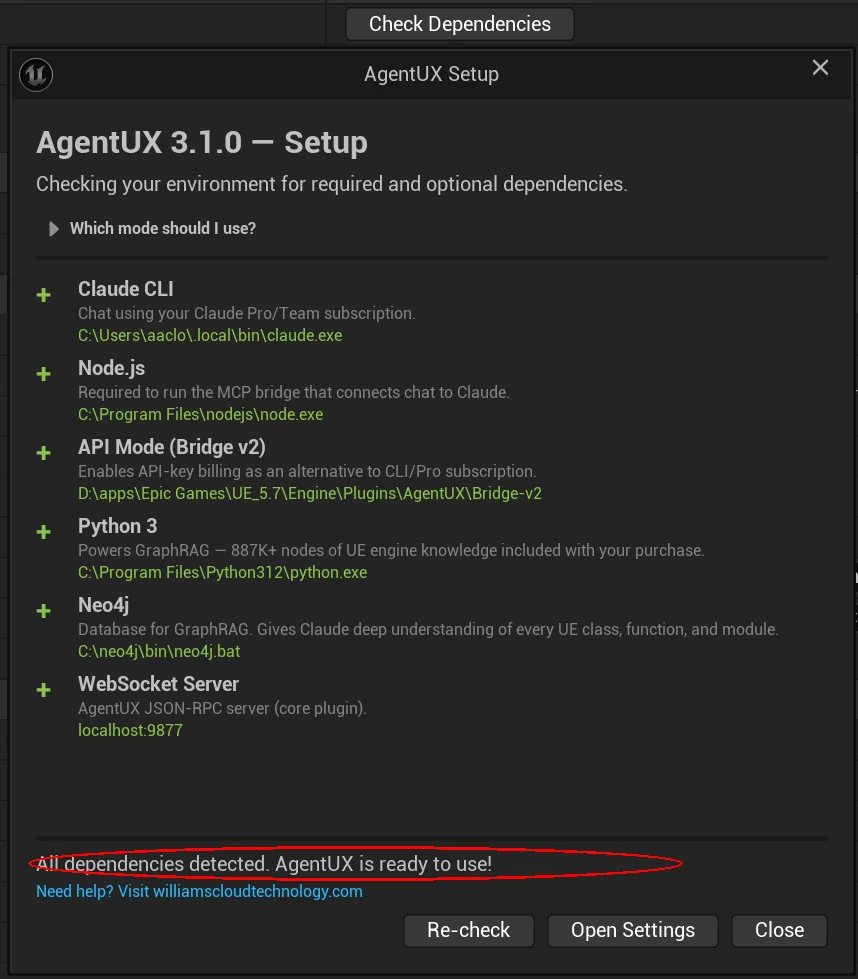
Plugin-Only Install (No Neo4j)
To start with editor control only and skip the knowledge base:
python install.py --skip-graphragEverything works without GraphRAG: you just won't have the engine knowledge tools. You can add them later by installing Neo4j and running the full installer.
Step 3: MCP Server Configuration
The installer generates mcp_config.json with two MCP servers. Add its contents to your Claude Code MCP settings.
Full Configuration (Editor Control + GraphRAG)
Add to your project's .claude/settings.json:
{
  "mcpServers": {
    "agentux": {
      "command": "python",
      "args": ["<path-to>/AgentUX/Bridge/agentux_mcp_bridge.py"]
    },
    "ue-graphrag": {
      "command": "python",
      "args": ["<path-to>/AgentUX/GraphRAG/mcp_server/server.py"],
      "env": {
        "GRAPHRAG_CONFIG": "<path-to>/AgentUX/GraphRAG/config.yaml"
      }
    }
  }
}
Editor-Only Configuration
If you used --skip-graphrag, omit the ue-graphrag entry:
{
  "mcpServers": {
    "agentux": {
      "command": "python",
      "args": ["<path-to>/AgentUX/Bridge/agentux_mcp_bridge.py"]
    }
  }
}
The agentux bridge auto-detects whether GraphRAG is available and exposes a graphrag_status tool so Claude can check connectivity at runtime.
CLAUDE.md Template
Copy the provided template into your UE project's .claude/CLAUDE.md. This teaches Claude how to control the editor and verify UE API names before writing code:
# From your UE project root:
mkdir -p .claude
cp <path-to>/AgentUX/Docs/CLAUDE_TEMPLATE.md .claude/CLAUDE.md
Step 4: GraphRAG Setup (Optional)
This step is optional. Editor control works fully without GraphRAG. Add it when you want your AI to verify UE API names, explore class hierarchies, and access engine documentation: reducing hallucinated property names and silent failures.
Install Neo4j Community Server
- Download Neo4j Community Edition 5.x
- Ensure Java 21+ is installed (
java -version) - Extract and start Neo4j:
Or install as a Windows service for auto-start:neo4j consoleneo4j install-service neo4j start - Verify Neo4j is accessible at
bolt://localhost:7687
Build the Knowledge Base
The installer handles this automatically when Neo4j is detected. If you need to rebuild or installed Neo4j after the initial setup:
python install.py --skip-depsThis reconfigures credentials, restores the pre-built knowledge base, and validates the ONNX embedding model.
What GraphRAG Provides
| Feature | Coverage |
|---|---|
| Source nodes | More than 16 million across all 27 UE5 versions (Pro and Team Studio) |
| MCP tools | 34 tools for search, lookup, versioning, experience system |
| Modules indexed | 2,313 modules |
| Plugins indexed | 716 plugins |
| CVars indexed | 9,602 console variables |
| Doc chunks | ~14,857 from C++ API, UDN, Blueprint API, guides |
See the GraphRAG Guide for the full tool reference and usage workflows.
Step 5: Verification
The Settings panel includes a Connection Status section that tests all three connections at once.

Test Editor Control
With the Unreal Editor open, run this Python script to verify the WebSocket connection:
import asyncio, json, websockets

async def ping():
    async with websockets.connect(
        "ws://localhost:9877",
        additional_headers={"Origin": "http://localhost"}
    ) as ws:
        await ws.send(json.dumps({
            "jsonrpc": "2.0", "id": 1, "method": "agentux.ping"
        }))
        print(json.dumps(json.loads(await ws.recv()), indent=2))

asyncio.run(ping())
Expected response:
{
  "jsonrpc": "2.0",
  "id": 1,
  "result": {
    "status": "ok",
    "plugin_version": "3.1.0",
    "ue_version": "5.7",
    "uptime_seconds": 42.5
  }
}
Test Engine Knowledge
If GraphRAG is installed, ask Claude in Claude Code:
"What properties does USpotLightComponent have?"
Instead of guessing from training data, Claude calls get_class_details("USpotLightComponent") and returns the exact property names, types, and metadata from your engine version.
Performance
| Operation | Latency | Notes |
|---|---|---|
| Plugin startup | ~3.4ms | WebSocket server + 45 handlers |
| Neo4j cold start | ~5.5s | JVM + database startup |
| MCP server startup | ~2s | Neo4j connect + verify |
| First semantic query | ~18s | One-time ONNX model load |
| Subsequent queries | <300ms | Embed + vector search |
| Structural queries | 4–45ms | Class lookup, hierarchy: fast from start |
Tip: Start Neo4j as a Windows service so it's always running when the editor launches.
Troubleshooting
WebSocket connection refused
- Is the editor running with the plugin loaded?
- Is port 9877 in use? Check with
netstat -an | findstr 9877 - Are you sending the
Originheader? It's required by the WebSocket server.
"Method not found" error
- Use
agentux.methods.listto see available methods - Method names are case-sensitive
Plugin not loading (retail build)
- Ensure the
Binaries/Win64/folder is present (pre-compiled DLLs) - Ensure
"Installed": trueis set inAgentUX.uplugin - Check the Output Log for
LogAgentUXmessages - Verify the plugin is in
Engine/Plugins/Marketplace/AgentUX/(engine-level) or<Project>/Plugins/AgentUX/(per-project)
Plugin not loading (source build)
- Run the build command with the editor closed
- Verify the plugin folder is under
Engine/Plugins/Experimental/orEngine/Plugins/Marketplace/
GraphRAG not responding
- Is Neo4j running? Check
bolt://localhost:7687 - Run
python install.py --skip-depsto reconfigure and test - Verify
GRAPHRAG_CONFIGenv var points to the correctconfig.yaml
Next Steps
- Quick Start: Get running in under 10 minutes
- API Reference: All 662 methods across 45 handlers documented
- GraphRAG Guide: Full knowledge base reference